Validate Data
Objectives
At the end of this module, you will be able to:
- Define and describe the purpose of data validation.
- Validate your data preparation results in the data grid.
- Determine additional cleaning operations needed by viewing row-level data in the data grid.
- Preview your data preparation results in Tableau Desktop.
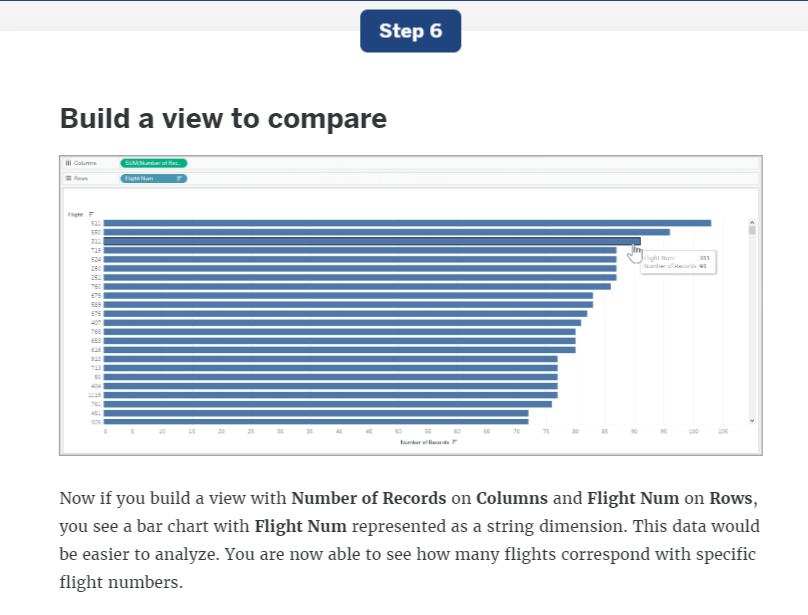
- Compare your data before and after applied data preparation operations in Tableau Desktop.
What does it mean to validate your data? Imagine that you have a data set and you want to know if it will answer your analytic questions. Data validation will tell you. Or, say that you have performed data preparation operations on that data, and you want to verify the success of those changes as well as to investigate the results. That is also data validation. Next, you may wonder how to validate your data. For example:
- How do you incorporate data validation into an iterative analytic process?
- How do you use Tableau Prep Builder to verify operations applied during your data preparation?
- How can you compare your data in Tableau Desktop before and after applying changes?
- Now that you’ve applied changes to your data, how can you see if it’s possible to create meaningful visualizations with it in Tableau Desktop?
This module will demonstrate how to use Tableau Prep Builder to validate that your data meets your needs, as well as to validate that the results are as you intended.
Use the data grid to support data validation
Validating your data is a necessary part of the iterative analytic process because it allows you to see if you have the needed fields to complete your analysis. It also allows you to verify that your data preparation operations have been successfully applied. You'll use the data grid to perform these validation tasks as we take a look at some flight data to which some cleaning operations have already been applied.
Verify that you have the fields you need
Toggle to the data grid view to focus on row-level data values. At this point, it seems as though you have the fields you need to answer your question about flight traffic. Remember that, in an iterative process within the analytic cycle, analysis can lead to more questions and the need for additional data.
Validate a cleaning operation
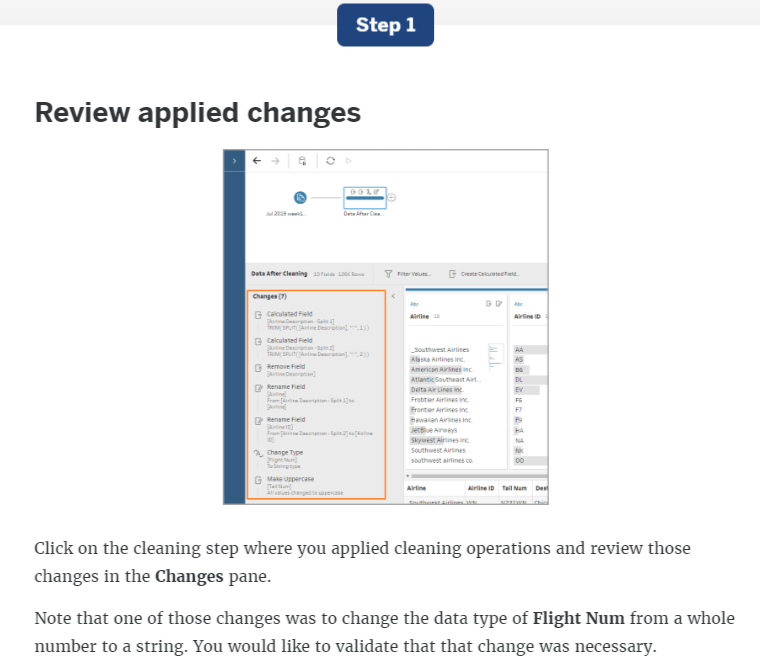
As you perform cleaning operations on your data, you can validate their success in the data grid. Select a change in the Changes pane to see its corresponding column in the data grid. In the Changes pane, if you select the change operation before the field is renamed, you can see the first field is named Airline Description - Split 1. When you click the Rename Field operation, you see the data grid reflects the changes up to and including the field renaming.
Validate other data preparation tasks
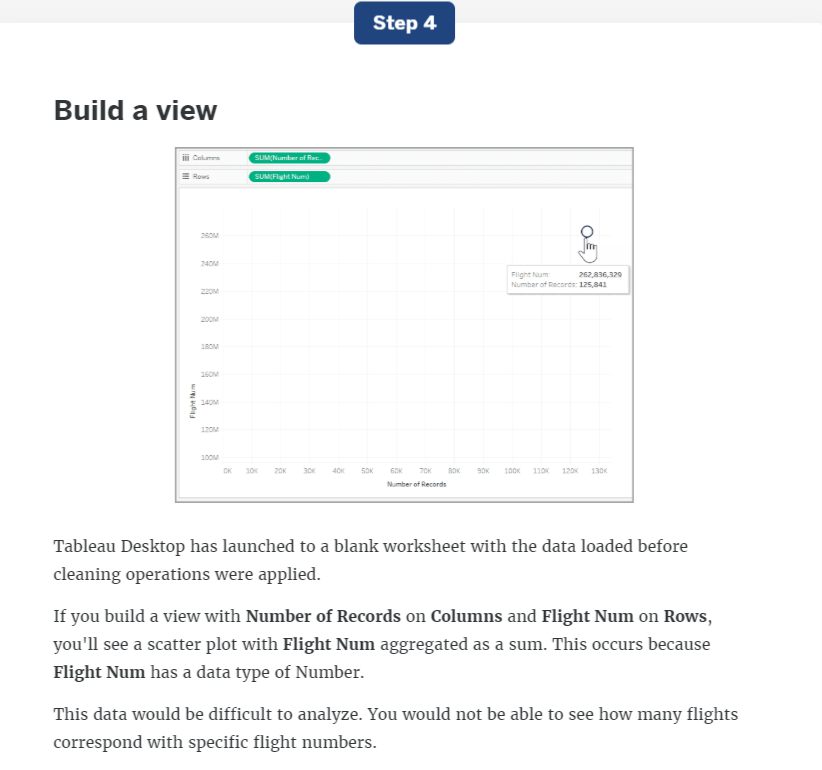
As you perform additional operations on your data, you can validate their success in the data grid. Select a change in the changes pane to see its corresponding column in the data grid. In the Changes pane, if you select the change operation before the data type is changed, you can see the Flight Num field is a whole number. When you click the Change Type operation, you see the data grid reflects the changes up to and including the Flight Num field being changed from a whole number to a string.
Discover additional necessary tasks
The data grid can reveal data preparation that remains necessary. Here, using the data grid reveals that the Airline ID is the same for the values “_Southwest Airlines” and “Southwest Airlines Co.” More cleaning needs to be done to resolve inconsistent values in the Airline field.
Preview in Desktop to support data validation
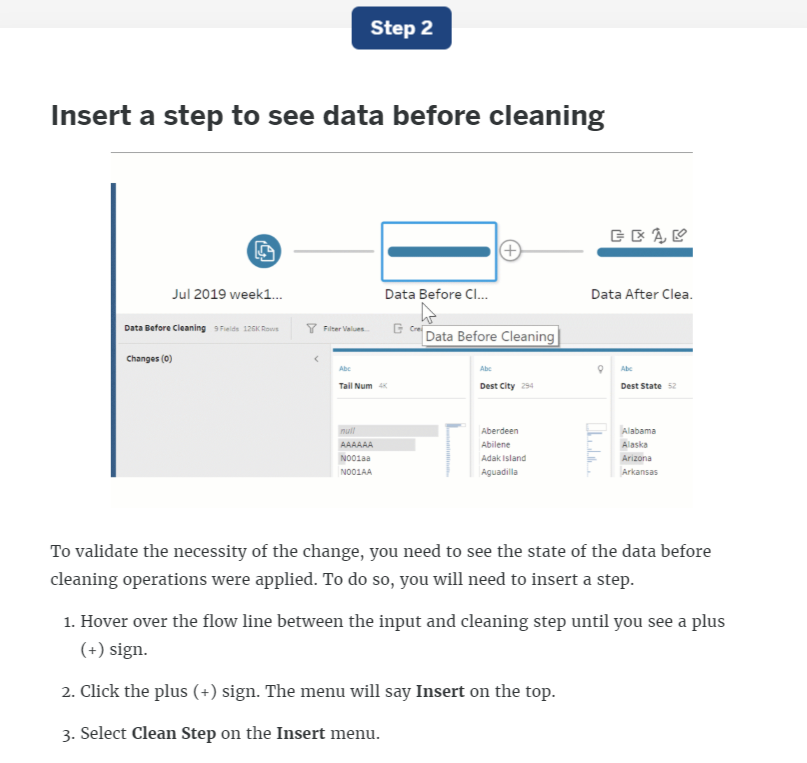
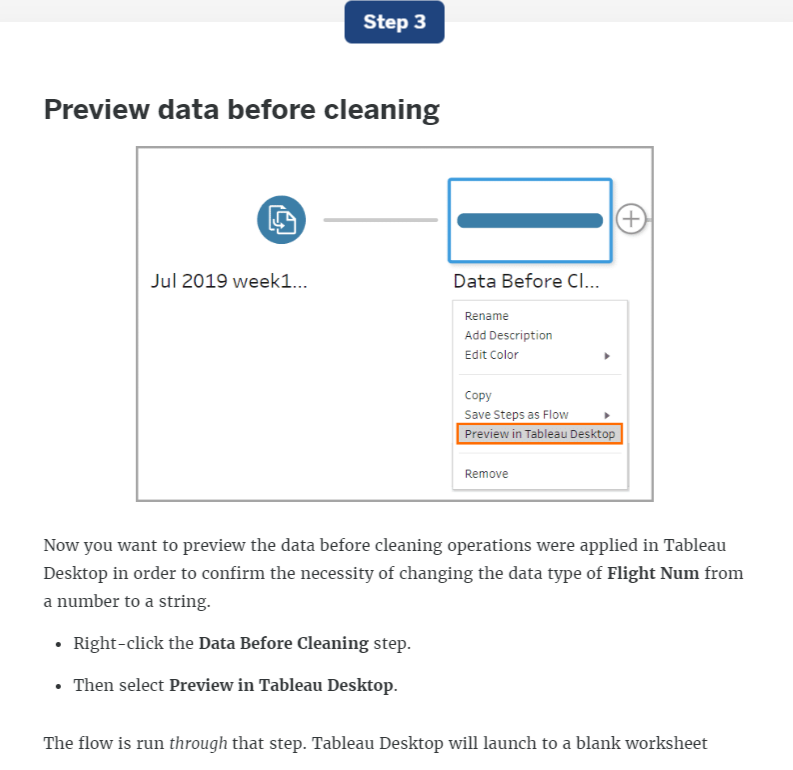
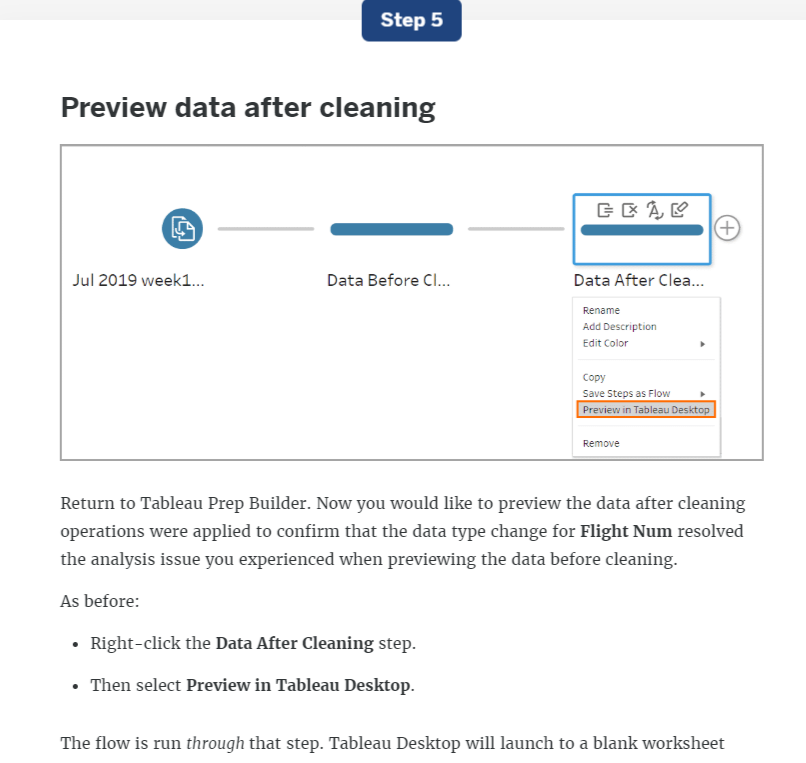
Another way to validate your data is to preview it in Tableau Desktop. You can do this directly within Tableau Prep Builder. When you select a point in your flow to preview in Tableau Desktop, the data preview will reflect all operations you applied to the data up to and including that point in your data preparation.
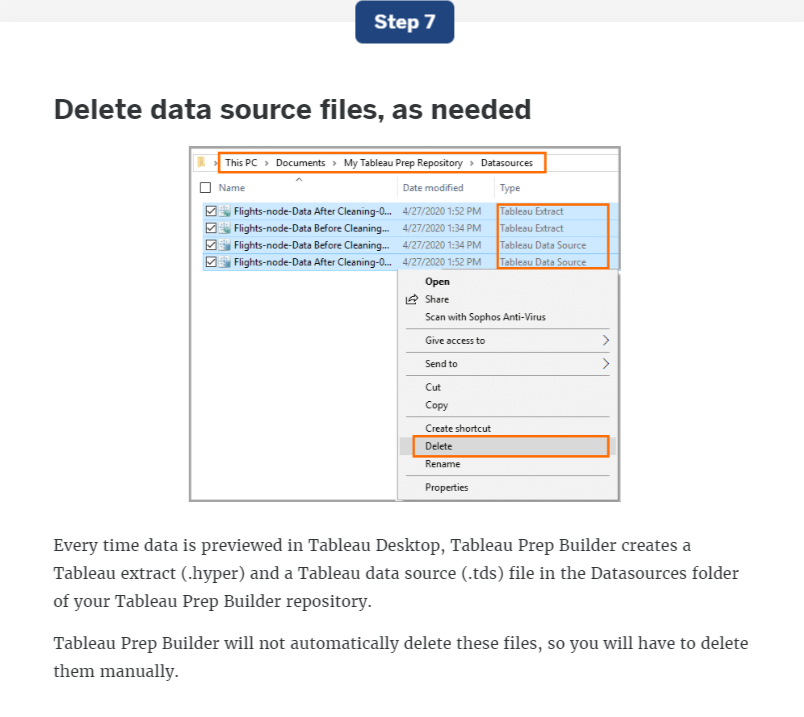
If you have visualizations that reference fields that have changed, those fields will be shown in red, and you will need to update the field references. Note: The extracts created by previewing are temporary extracts for testing purposes. After testing is complete and you have validated that the results look as expected, you can delete these extracts from your repository. You can learn how to create a completed extract in the Generating Output module.
